*This is about building a bike from the frame up, not the fine art of welding a frame into life. Sorry if you’ve come here under false pretences.
I didn’t know I wanted to build my own bike. Then I did.
That bit came later, First came a flash of a red, retro-looking frame being ridden on to Southwark Street. It had written on it in red HARRY HALL.
This caught my eye. My son is called Harry Hall, and fine chap he is. Being only six years old, a frame builder he is not. Further investigations revealed that Harry Hall was a Mancunian bike builder of some respite, a well as being Tom Simpson’s mechanic and by Simpson’s side when he passed away on Mount Ventoux. Hall’s branded Mini van was one of the icons of British cycling in the decades that followed.
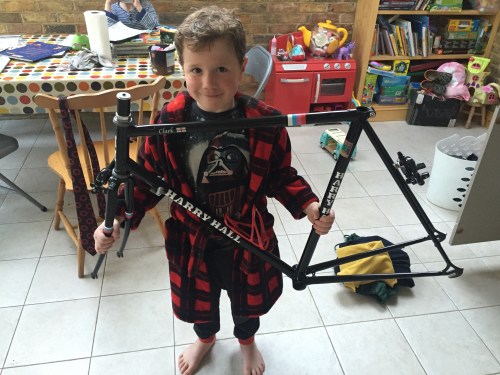
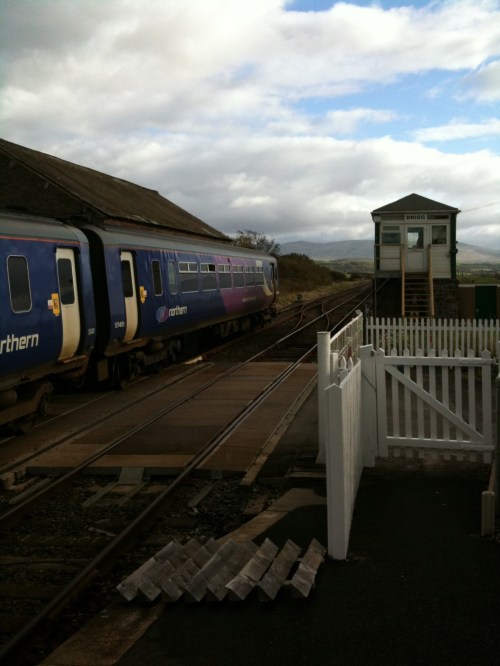
Harry Hall acts as a custom bike stand for his namesake
Though Harry Hall died in 2007 his shop still lives on in Manchester. It no longer builds frames.
Having spotted this, I started to look out for a frame and found one eBay. As sometimes happens, idly bidding on something results in you winning it, and here the trouble started.
The fellow I had bought the frame off, though very nice, seemed unwilling or unable to get it to me, and I spent a few fretful weeks going back and forth being unsure if I’d been ripped off. In the end the frame did arrive.
Now I had it, I had to do something with it. As lovely an item as it was, built from Reynolds 653 steel with embossed ‘H Hall’ forks it was a long way off being rideable. So, bit by bit, I started to accumulate the parts to do just that. Then I figured I’d put it together myself, or go as far as I could in the process and learn some more along the way about how bikes work.
This has been an interesting exercise, and by doing it I’ve picked up some new skills as well as making mistakes along the way. I thought Id share some of the things I found useful, and some things that were rabbit holes.
Parts list – things I didn’t have that I needed
Front & rear derailleur/mech
Bottom bracket
Stem
Handlebars
Shifters
Cable – brake cable and gear cable, inner and outer
Seatpost
Saddle
Tools list – some I had, some I had to buy
Grease
Standard multi-tool (Condor)
Allan key set
BB tool
Cassette tool
Chain whip
Pliers
Cable pliers
Cable cutters
Chain tool
A rag
Baby wipes
Electrical tape
Pedal wrench
Other interesting things
Bike stand
Dropout limiter screws
Torque wrench
Rough sequence of events
The thing that slowed me down and gave me pause for thought was not getting the parts and fitting them. Generally, with a few exception this was pretty straightforward and I did it over a couple of months, funded by selling some old Arsenal shirts on eBay. It was working out which tool to buy and then picking them up that was the slower exercise. I’d imagine like a lot of cyclists like me I’ve got a box full of tools and other bits so never invested in a toolkit, so I ended up augmenting what I had. While it was a little annoying to buy a cassette tool and only use it for one part of proceedings, I do now have it for the future.
Most of the parts I needed were picked up cheaply on eBay – a second hand SRAM Apex groupset which was complete except for the shifters was the key purchase, and inexpensive at £35. I needed to add the shifters, which I ended up having to buy new from Taiwan (more on fitting those later) and a new bottom bracket as the one that came with the groupset I got wasn’t compatible.
Bottom bracket
Bottom brackets – the central part of the axle that the pedals screw into – come threaded in a variety of ways, and I found by asking the guy I got the frame off which one he had – an English threaded Trumativ SRAM/GPX one – which one to get. It felt like quite an obscure bit of kit as I’d never seen one before, and was an oddly exciting purchase. Anyway it also was the first thing I fitted, once I’d got a bottom bracket tool. I fitted things without a torque wrench – one is on my christmas list – and it all rides fine. I’m not saying one isn’t a good investment, just that I didn’t have one. Once the BB was on the front cassette and cranks were easy to attach.
Headset
As the bike is a little old – but not Eroica old – I thought it could do with a more classic-looking headset than the one it came with, including the quill stem adapter that can be seen in the picture above. Having looked online, then at the tools needed to do that job and still having no idea how to do it I took the bike to the Vintage Bike Cave in Highgate and asked them to do this part of it. Takashi there was pretty helpful with the other stages, and once I’d done everything else I took it back there and asked him to check over what I’d done.
Stem
With a classic headset came the need for a stem. As I said above, I removed the stem adapter that came with the frame and opted for a quill stem, the more retro-looking ones, and picked up one in Condor Bikes on Grays Inn Road. They were very helpful in choosing one based on the setup on my other bike, which is a Condor Fratello. It was nice to talk to people in the shop who were enthusiastic about what you were doing. This was one of a few times I felt liked I’d tapped into a different seam of bike nerdery, a far nicer one than the lycra/road bike crowd. My job is not a creative one, but this was a creative project, and that was unusual for me so it was good to get encouragement.
Bars and wheels
The stem and the vintage Saeko roadbars I picked up (£10, eBay again) were easy to fit, aided by plenty of grease. Grease and a cloth and/or baby wipes for my hands after were never far away. By this point I’d picked up a pair of Bontrager wheels from a mate. Cheap wheels are a false economy and I got them from him for half price.
Fitting the cassette
The cassette was straightforward to fit once I had the cassette tool. I was nervous about getting the spacers right but it all slipped on fine and ran fine when I was setting the gears up. Putting the individual sprockets on was a little bit of a fingers crossed process, as with quite a bit of this I let me enthusiasm run away with me rather than being completely methodical. I figured if I made a mistake, which I expected to, I could go back and fix it and learn along the way. A couple of times (mainly with front shifter cabling) I had to go back a step, but mostly it was fine.
Cabling and shifters

One shifter attached
With wheels, bars and cranks on Harry Hall was starting to look a lot like a bike. It was at this stage what I would say the more challenging part was started. The shifters and rear derailleur but went on easily with a hex wrench. The shifters came ready cabled with 1.1mm gear cable. If at all possible I’d suggest getting this right first time, as I didn’t and re-threading the cable through the shifters was a dog of a job. I did it three times in the end for various reasons and each time it took the best part of an hour and a lot of swearing and gentle patience. From reading online it seems SRAM shifters make pretty hard to fit the cable through the routing. I found it hard. That said, it wasn’t impossible, just fiddly and frustrating.
All of that meant that fitting the cabling felt a little stressful. In no particular order, I discovered that there are different cables for gears and brakes, and different cable housing for gears and brakes. Cables also come with various end buts (ferrules) that again are different based on what you’re fitting. Then there are the ones that go on the cable ends once you’ve cut them to stop the cable fraying. This is where your pliers come in. I asked for a few extra ones of each end bit when buying cable.
Also on cabling: if I was doing it again I’d resist cutting off slack cable too soon. On a couple of occasions I didn’t have the shifters in the right (neutral/fully clicked out) position and when I fixed that lost some length. Ditto for adjusting the tension. replacement cables weren’t expensive, but it all adds up and as soon as one came out you had to fit it again and the wailing and gnashing of that exercise came back, like Satan’s heir returning to earth.

You also need a little more than you think, as the cable has to have enough give in it to not become tensed when the bars fully turn, and because they’ll be strapped up under the bar tape. However, as myriad bike mechanic videos online note, you don’t want too much either. I used my other bike as a rough reference point. I still got it wrong a couple of times. Not a big deal, but worth resisting final cuts until late in the process.
Adjusting the gears
Getting the chain and rear derailleur running together was fiddly, as I was expecting it to be. The main issue was splitting the chain – I found a couple of video online that showed how to remove a magic link using a section of cable that worked well as I was struggling to get it off, but it then snapped on quite straightforwardly and feeding it through the derailleur was easy with a picture of what it should look like. This was a nice moment as for chain was turning the wheel and for me that means you have at least a basically working bike.
Again following online tutorial videos it was pretty easy to get the rear shifter working pretty well, and get the tension right. This required some trial and error with the limiter screws and the cable tension. I didn’t know precisely what the limiter screws did on the RD before this, so it was useful to play around and find out.
Note comments above about not trimming off too much loose cable too soon.

Electric tape to secure the outer cable housing before applying bar tape
(Not getting the) front shifter (right)
The front derailleur was another matter altogether. Firstly, feeding the cable into the SRAM shifter was beyond fiddly and produced an avalanche of curses. It’s been noted the shifters like 1.1mm cable more than 1.2mm. I fitted 1.2mm in the end so it can work. Once it was through – there wasn’t really a knack, more gentle and constant application of the greased cable to encourage it upwards through the hole – then it was easy to fit to the derailleur. Trial and error (again) on the limiter screws on the front got plenty of movement, but no matter what I tried I couldn’t get the derailleur to shift far enough over to move to the top ring. Online searches suggested I was not alone, but this was one task that defeated me and I returned to the Vintage Bike Cave. Takashi there couldn’t quite get it right, but suggested I was not attempting to start from the right position. Next time perhaps I’ll get it right.
Lacking a bike stand, I improvised with a couple of chairs in my kitchen at first, and then by purpose-chopping some branches off a study, short tree in my garden.
The first ride I did was before the bar tape went on, to check I wasn’t massively wrong in anything I’d done. I have put bar tape on in the past but this time I let Takashi do it as it was in the workshop anyway, but it’s pretty simple. A part of me liked the clean look without it, but as I had big shifters on the bars anyway I figured tape was the way to go.
With the front derailleur sorted – and I figured getting someone else to look the whole thing over before I put it into service – the bike was ready to ride. As you might expect it’s very lovely to ride something you’ve found the parts for and pretty much built yourself, and it rides very nicely.
Apologies if this jumbled collection of notes is incomplete. I wanted to put something down before I forget to do so. And should you have any further questions I will do my best to answer them.

First nervous outing to Highgate Men’s Pond
Baby wipes
The very best thing for keeping your hands and the bike nice and clean. Keep some handy.


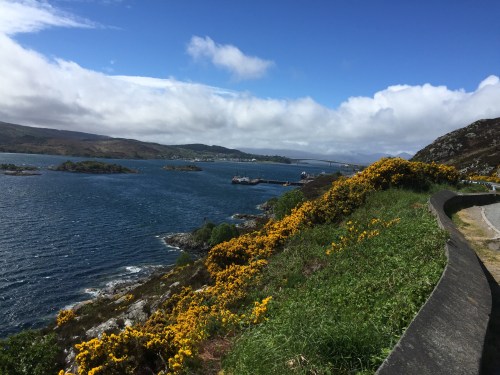
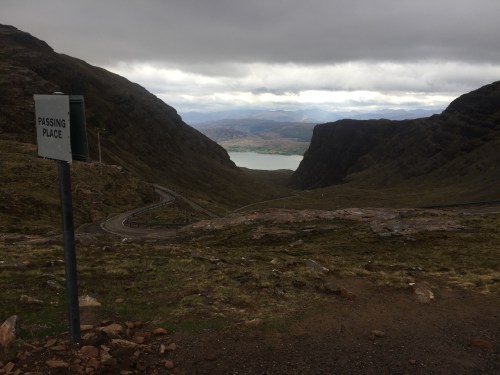 The descent down the astonishing corrie of the east side of the Bealach brings relief but more reminders of the conditions. Ascending riders going the other way seem to be gliding up the steep side of the pass, including one heavily-loaded tandem. As I near the bottom emotions bubble up. Perhaps this climb has built up too much over the months I’d been planning it, perhaps the fear of the day before, resurfacing as adrenalin. I stop in Lochcarron village and eat a frankly amazing chicken roll. The bike gets blown over outside the Post Office. It starts to rain. It was that kind of day.